Animated Clock Font on Lock Screen
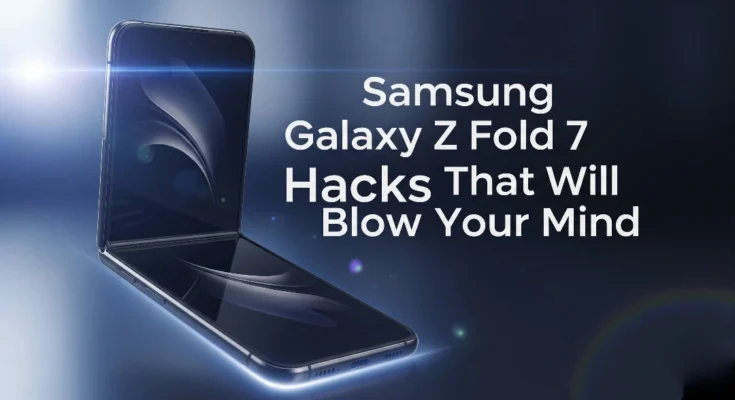
Samsung just blew my mind with the Galaxy ZFold 7. So, I found all the best tips and tricks for you guys. Let’s go.
Okay, so here’s the first new feature. If you tap and hold down on your lock screen, then tap on the clock, you’ll see this brand new clock font that’s animated. And basically how it works is depending on what subject you have on your wallpaper and its shape, this new clock will auto resize itself to that shape. It also comes with this really cool animation every time you lock and unlock your phone. So you just got to give this one a try.
Charging Edge Lighting Effect
Then another really cool feature is inside your settings under modes and routines. Then under this discovery tab, if you scroll down, you’ll find something called charging. Select it. And in here, if you tap on this edge lighting effect, you got a couple cool options to choose from. Or you can even customize the one you like. And when you’re all done, make sure you click save. Because now, check this out. Whenever you plug your phone into charge, boom, this sick lighting effect will show up and let you know that your phone’s charging. And by the way, it works on both screens. So the main screen, including the cover screen. Nice.
90/10 Split Screen Mode
Then for another new feature I really like is when you open up two apps in split screen mode. Right now, if you drag this line to around this point, it turns on this brand new mode called 9010 view. And now, if you just quickly want to switch between apps, just tap on the one, it’ll quickly switch to it. Tap on the other and it’ll switch back. I mean, this is great for multitasking. And again, this works on both screens. So nifty. And if you’re wondering how you can do this sick split screen trick, it’s actually super easy.
Multi-Window for All Apps
Now, there’s a lot of cool things you can do with this massive display, and one of them is splitting it into two, or even three separate screens, but not all apps let you do that, which sucks. So, here is how you fix that. Inside your settings, if you scroll all the way down to advanced features, then tap on lab settings, turn on multi-wind for all apps, because now any of your apps, even the ones that didn’t work before, can suddenly be split screen, which is great. Then back inside your advanced features, this time instead if you go to multi-wind and turn on all of these. Once you’ve got them on, try this out. Inside an app, use two fingers to swipe to the side. And bam, instant split screen. You can swipe a few different directions. So you can swipe up to split to the top, left to split to the left side, and right to split to the right side. You can split up to three apps at a time, which is pretty crazy. And if you ever wanted to rearrange them, just tap these three dots in the center and use this icon to shuffle them around. Or if you’re in an app, you can try dragging in from the top left or top right hand side to open up window mode. Pretty cool. And we are only getting started with everything you can do on this beast.
Keyboard Layout and Size Adjustments
Okay, so let’s get real. Typing on this huge screen can sometimes be a pain in the butt. But there’s actually a way to make it way easier. And here’s how. Inside your keyboard. If you tap on this icon, it’ll open up modes, and this is where you can change your keyboard layout. So, there’s this standard mode, basically like a huge keyboard, a split mode, which is on by default and splits the keyboard, and then a floating mode, which I’d say is pretty useful if you want to type with just one hand. But to make typing even easier, you’ve got to try this. Make sure you’re on the split keyboard. Then tap these three little dots. Click the plus icon and add keyboard size. Now, inside keyboard size, you can actually adjust how big or small you want the keyboard to be. So, I suggest you pull it down to its smallest size. And now, each half of the keyboard is right under your thumb, making it way easier to type than the default setup. So, definitely give that a try.
Separate Cover Screen and Main Screen Layouts
So, by default, any changes you make on the one screen instantly affects the other screen, which honestly can be quite annoying. So, what I’d recommend you try is go to your home screen settings, right? Then, under cover screen mirroring, turn this off and hit apply. What this does is completely separates the layout. So, you got the cover screen layout that is completely different to the main screen layout. I’m not going to lie, that’s super nifty. Also, while you’re busy customizing the main screen, put all your apps into folders, which might not look the greatest at first, but if you tap and hold on to them, don’t forget you can now enlarge folders, and it looks so much better. So, if you do this for all your folders and add some widgets like a gallery widget, the battery, and weather, you got yourself a pretty banging looking setup.
Continue Apps on Cover Screen Options
And speaking of apps, this next trick totally changes the way you use them. All right. Now, on your main screen, if you head into settings, then tap display and scroll all the way until you see continue apps on cover screen, you’ll see there’s now three different options. And each one of these does something a bit different. So, if you pick always, whenever you’re using an app and you close the phone, that same app will pop up on the cover screen. And this works both ways. So, main screen continues over to the cover screen and the cup screen continues over to the main screen. minutes. Then there’s this new option called swipe to continue. And what this does is instead of the app instantly carrying over to the cover screen, you get the choice. So if you want to carry on, you just swipe up or if you don’t, just leave it. And finally, there’s the never option, which does exactly what it sounds like. Your apps will stay only on the screen you last used it and never crosses over.
Flex Mode Panel
But there’s an even cooler way to use your apps, and that’s using Lex Mode. [Music] Now, everyone with a fold needs to know about this. Inside settings and under advanced features again, there’s this setting on the right called flex mode panel. Make sure you turn this on. Then scroll down and make sure you also turn on this option. Because now, if you open an app like YouTube, for example, and you fold the main screen in half, voila, you get flex mode. This essentially divides the screen into half and turns it into like a mini laptop. There’s this touchpad on the bottom that brings up a mouse cursor when you navigate around with it. And next to that, there’s even a freaking scroll wheel you can use for a bunch of different things, like one of them being scrolling up and down web pages.
Wireless Dex on Smart TV
But there’s actually a super easy way to turn the Fold 7 into a real computer. Okay, now this is so cool. All you need is your Fold and a Smart TV. That is it. First up, you got to make sure that both the Fold and the TV are connected to the same Wi-Fi. Pretty simple. Then, inside quick settings, if you open up this menu, you’ll now see wireless Dex. And when you tap it, this message pops up and prompts you to start. Now, once you press it, boom, your Fold wirelessly connects to your smart TV and basically turns it into a computer. And what’s so crazy is if you fold the screen and tap this little icon in the bottom lefthand corner, it turns the cover screen into a touchpad. And I mean with that touchpad, you can do so many different things. So you can open up all your different documents, you can browse the internet, watch a bunch of movies or YouTube, write down notes, or play a couple games. I mean, literally anything and everything a normal computer can do. And also don’t forget you can connect a Bluetooth mouse and keyboard to the fold if you wanted to and go fully wireless which is nuts. So you can use this as a phone, as a tablet, as a laptop.
Camera Tricks (200MP & Preview)
And let’s not forget you can now take 200 megapixel photos with it. So by default the camera doesn’t actually use its max 200 megapixels. Instead, it just uses the 12. So, to fix that, just tap here, and now you’ve got the max res. It’s literally that easy. But there’s a bit of a problem. If you leave or close the camera app, then go back into it, it switches back to the 12 megapixels, which is super annoying, but you can actually fix that. And all you do is tap on these four little dots, then go inside the camera settings, scroll down until you see settings to keep, and in here, toggle on high picture resolution. Now, every time you open the camera app, it’s locked in its full 200 megapixels. And if you want to change it back to 12, just tap it.
Then, another trick you’ve got to know about is on the main screen when you’ve got the camera app open, you see this little button over here? Well, this is called the preview button. And it essentially turns the cover screen into a mirror or preview window. So, this way now, whoever you take a picture of can actually see themselves and then pose for the perfect pick. So cool. Oh, and another trick. If the camera’s open on the cover window and you tap this selfie icon, you can also use that preview window to take selfies using the main cameras. And what’s nice is your hands on the main screen don’t interrupt everything. So now you can take ridiculously good selfies that are literally 20 times better than using the standard selfie cam.
Taskbar Tricks
All right, one of the coolest parts of the Fold is this little guy right here, the taskbar. And I got three killer tricks for it. So, number one is quick split screening. If you open up the app menu and drag any app onto any part of the screen you want, check it out. It instantly opens in split screen mode. Number two is tidying up the taskbar. So, if you go to settings, then scroll down into display on the right hand side, look for taskbar. And in here, turn off show recent apps. And why you should do this is as you can see it frees up a lot of extra space in the taskbar which is great but also for number three now that you have all this free space instead of only having a few apps in the taskbar you can actually drag in up to eight different apps and customize it however you want which personally is a lot better than having a bunch of recent apps in there if you ask me.
Samsung Galaxy Z Fold 7 – check out all the hidden features here.
Hidden Document Scan and Save as PDF
But now, let me show you a super hidden trick you’ve probably never seen before. All right. Now, this next trick is super hidden, and there’s two parts to it. So, part number one is if you hop into the camera app, then go into the camera settings and look for scanned documents, tap on it, and turn on autocan. Because now, if you whip any document in front of the camera and hold still, your phone will recognize it’s a document. Then you just got to tap on scan, hit save, and just like that, it’ll save this scanned image into your gallery.
And now for part two. So back inside your gallery, if you hit the menu icon, then go into settings and scroll way down to about gallery. If you tap a couple times over the version number, you’ll see this message pop up. And once that’s done, go back to the gallery settings. And now you’ll suddenly see this new option called gallery labs. And in here is a setting you can turn on called save as PDF. Turn that on and then finally check it out. If you tap and hold on those scanned pics from earlier, then hit this create button, you can now save them all as a PDF. This will save each scan on its own page in one single PDF, which is just so useful.
Lock Albums and Hide Apps
But there’s actually another hidden setting inside Gallery Labs. Okay, so back inside gallery settings under the new lab section, look for album entry locks. Turn this baby on because now inside your gallery albums. If you ever got an album with some juicy content or maybe some important documents, tap and hold in it. Then under more, you’ll see you can now lock it. This will hide its thumbnail, but also lock the album. And the only way to open it up is by your fingerprint or passcode. Shaky shneaky.
But that’s not the only way to hide your stuff. Let’s say you’ve got some questionable apps. Well, if you go into the home screen settings, you’ll see an option to hide your apps from the home screen and app draw. So, in here, you can choose exactly what apps it is you want to hide. Then, just click on done, and poof, those apps will straight up disappear. And even if you try searching for them, you won’t find them. So cool.
Quick Screenshot Gesture
Oh, and if you’ve ever wondered how to take a quick screenshot on this giant screen, then just swipe your hand across. Nice.
So, now that I’ve bent your mind with the coolest tips and tricks this beast can do, you should bend your finger and check out appheaven.site for more amazing guides and tips.


